.jpg?x-oss-process=image/auto-orient,1/quality,q_100/resize,m_mfit,w_1000,h_1000 "New Carburetor compatible for Toyota 2F 4.2 L compatible for Land Cruiser 1975-1987 2110061012")
.jpg?x-oss-process=image/auto-orient,1/quality,q_100/resize,m_mfit,w_1000,h_1000 "New Carburetor compatible for Toyota 2F 4.2 L compatible for Land Cruiser 1975-1987 2110061012")
.jpg?x-oss-process=image/auto-orient,1/quality,q_100/resize,m_mfit,w_1000,h_1000 "New Carburetor compatible for Toyota 2F 4.2 L compatible for Land Cruiser 1975-1987 2110061012")
.jpg?x-oss-process=image/auto-orient,1/quality,q_100/resize,m_mfit,w_1000,h_1000 "New Carburetor compatible for Toyota 2F 4.2 L compatible for Land Cruiser 1975-1987 2110061012")
.jpg?x-oss-process=image/auto-orient,1/quality,q_100/resize,m_mfit,w_1000,h_1000 "New Carburetor compatible for Toyota 2F 4.2 L compatible for Land Cruiser 1975-1987 2110061012")
.jpg?x-oss-process=image/auto-orient,1/quality,q_100/resize,m_mfit,w_1000,h_1000 "New Carburetor compatible for Toyota 2F 4.2 L compatible for Land Cruiser 1975-1987 2110061012")
.jpg?x-oss-process=image/auto-orient,1/quality,q_100/resize,m_mfit,w_1000,h_1000 "New Carburetor compatible for Toyota 2F 4.2 L compatible for Land Cruiser 1975-1987 2110061012")
.jpg?x-oss-process=image/auto-orient,1/quality,q_100/resize,m_mfit,w_1000,h_1000 "New Carburetor compatible for Toyota 2F 4.2 L compatible for Land Cruiser 1975-1987 2110061012")
.jpg?x-oss-process=image/auto-orient,1/quality,q_100/resize,m_mfit,w_1000,h_1000 "New Carburetor compatible for Toyota 2F 4.2 L compatible for Land Cruiser 1975-1987 2110061012")
.jpg?x-oss-process=image/auto-orient,1/quality,q_100/resize,m_mfit,w_1000,h_1000 "New Carburetor compatible for Toyota 2F 4.2 L compatible for Land Cruiser 1975-1987 2110061012")
.jpg?x-oss-process=image/auto-orient,1/quality,q_100/resize,m_mfit,w_1000,h_1000 "New Carburetor compatible for Toyota 2F 4.2 L compatible for Land Cruiser 1975-1987 2110061012")
.jpg?x-oss-process=image/auto-orient,1/quality,q_100/resize,m_mfit,w_1000,h_1000 "New Carburetor compatible for Toyota 2F 4.2 L compatible for Land Cruiser 1975-1987 2110061012")


Declare: Declare: Firstly appreciate the write-up and analysis from love2fly. But the below graphic content source network, if any infringement, please contact the editor to delete!
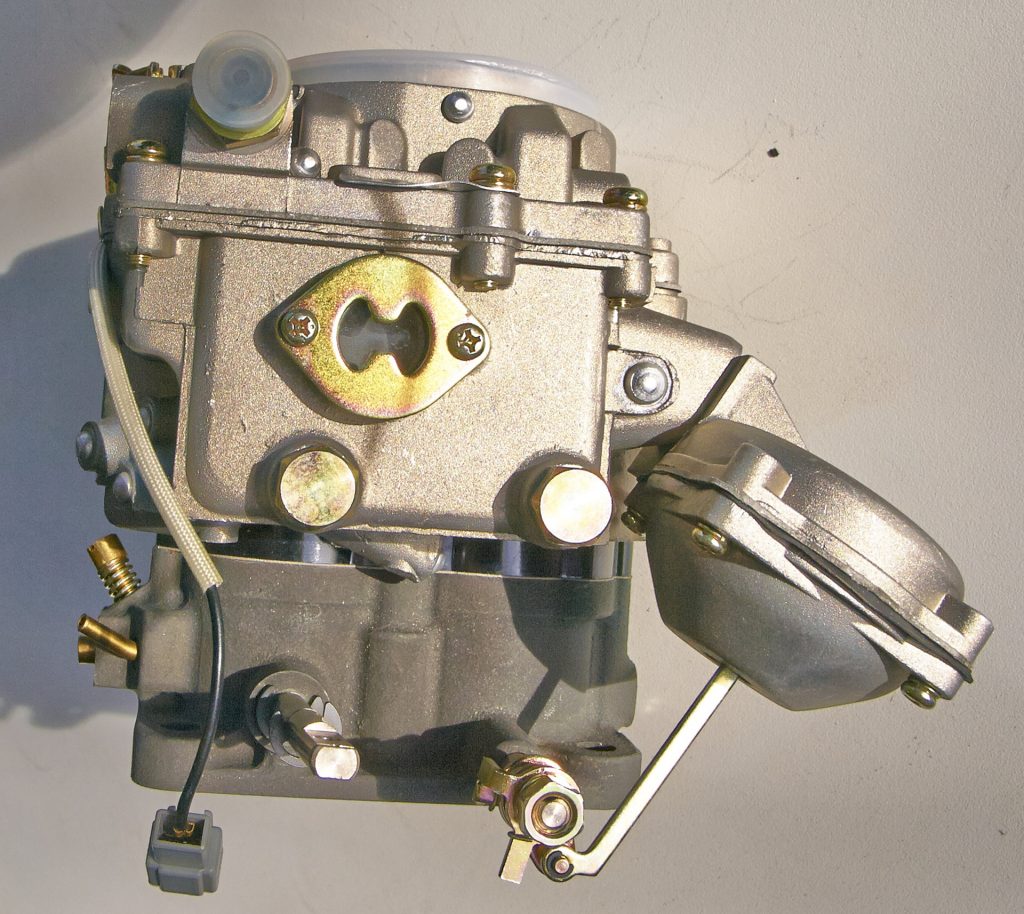
Received my back-up trail carburetor today that I bought on MaXpeedingRods. I will share the brake down on one carb from MaXpeedingRods Carbs that I got and what I found.
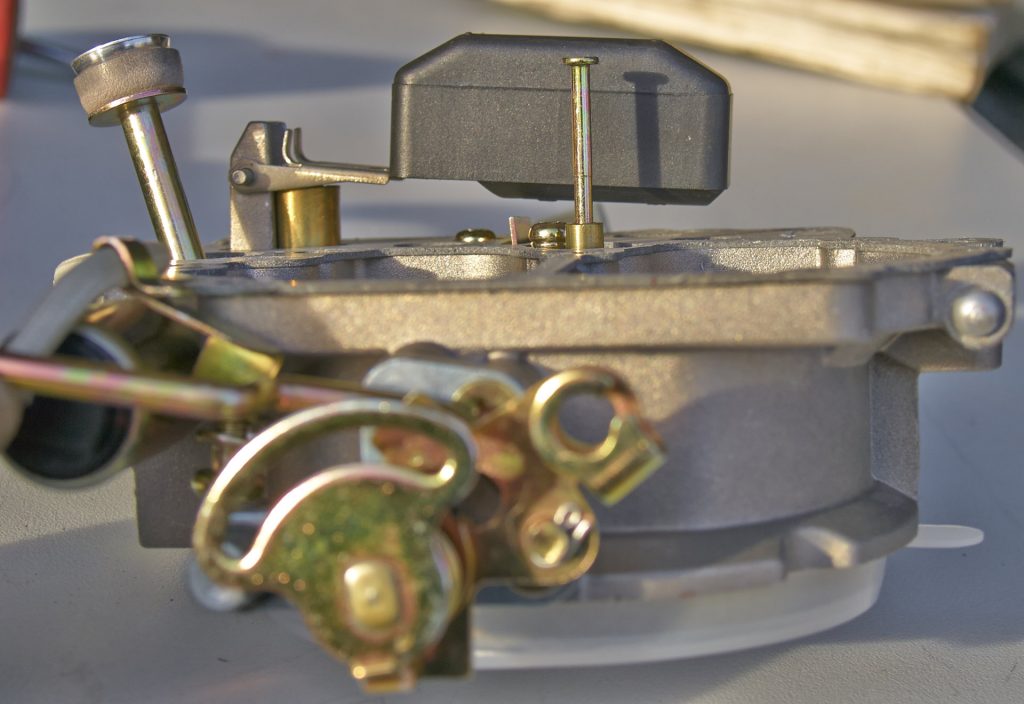
The first thing I noticed was the lowest A/C extended shaft was bent and the side spring arm was also bent. I can make two guesses on this as someone dropped the carb at somepoint and or happen in shipment. Regardless it was there but was an easy fix. Most of the time I will cut off the shaft anyway but was more concerned that it will snap off inside the bearing are on the body, but it did not with a few light taps from a soft mallet.
The body casting is not real bad, I had seen horrible cast on aftermarket carbs and this is okay. It is also not real porous in the casting, seems pretty clean.

Does not come with a air cleaner stem.
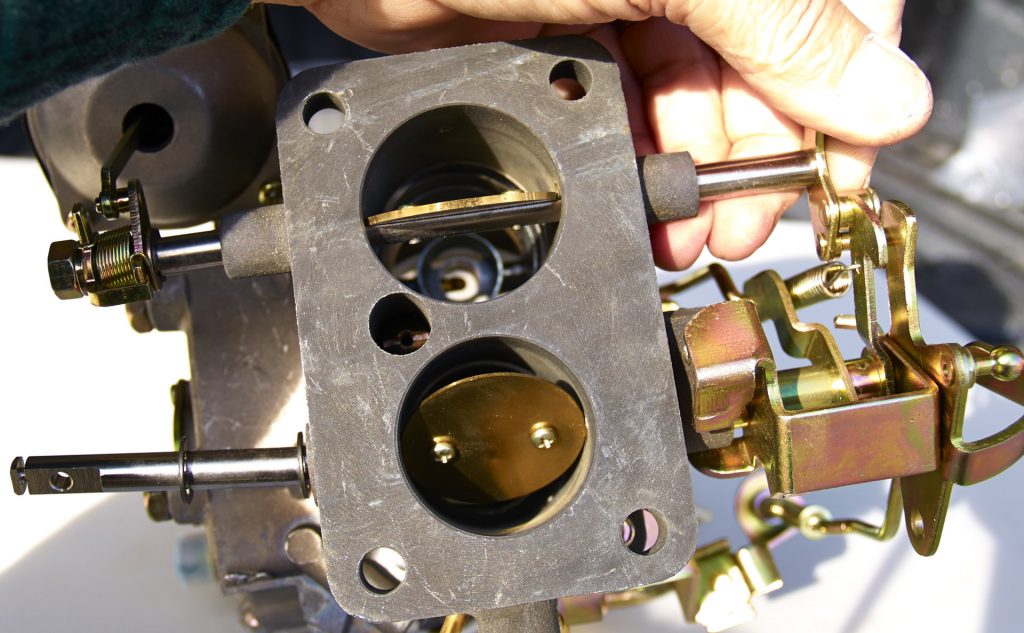
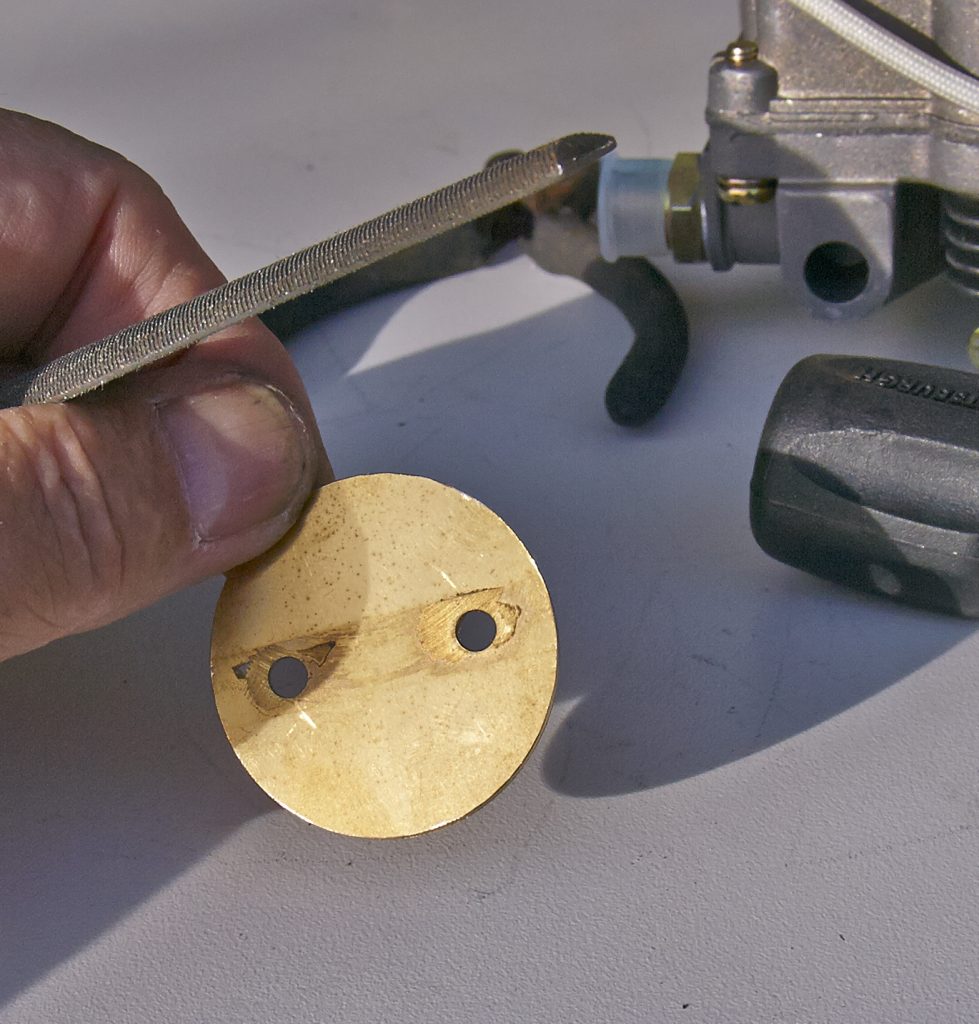
The butterfly screws are not pinged so I will be adding some Blue Lock, I do not want them falling off into my manifold. The edges of the butterfly’s on the brass had a bit of a burr on them so I used a file to knock that off on both. The secondary butterfly has the beveled edge for seating in the throat of the carb, so that was good to see. the secondary was not set to the proper opening/closed position so a fast bent on the adjuster arm to specs took care of that. Next I was fearing the removal of the top to view the float bowl and the float and needle valve.
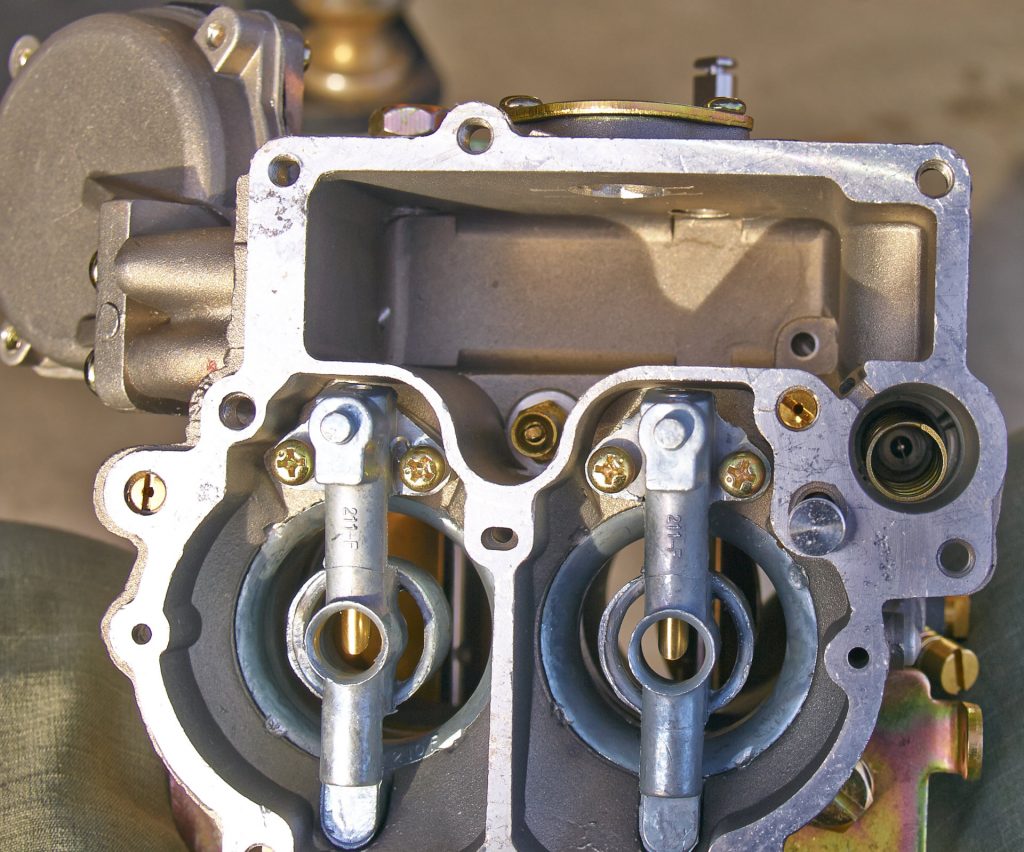
When removed, I was impressed, no junk or shaving laying in the bowl. The float itself has even what I call a good bend tab for adjustments compared to some that hardly have a tab to adjust. The needle valve even had the rubber tip that I myself prefer for a needle valve. The float was set up correct after I checked it, not bad. The jets look in excellent shape no corrosion, did forget to get the sizes but will do that later.
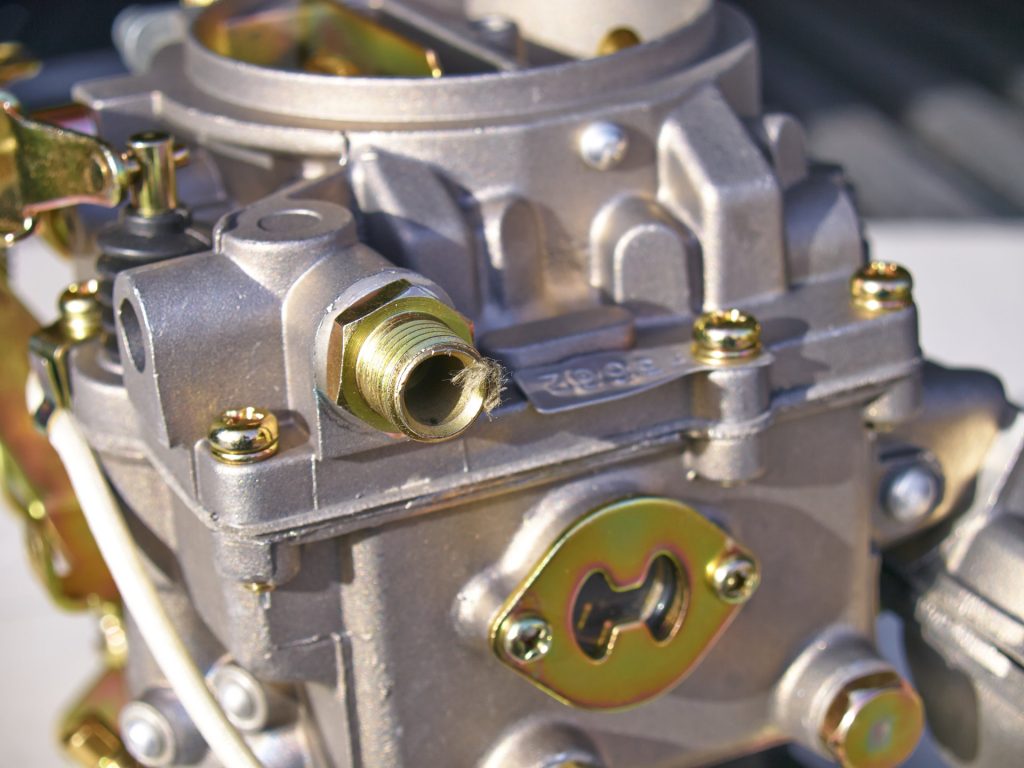
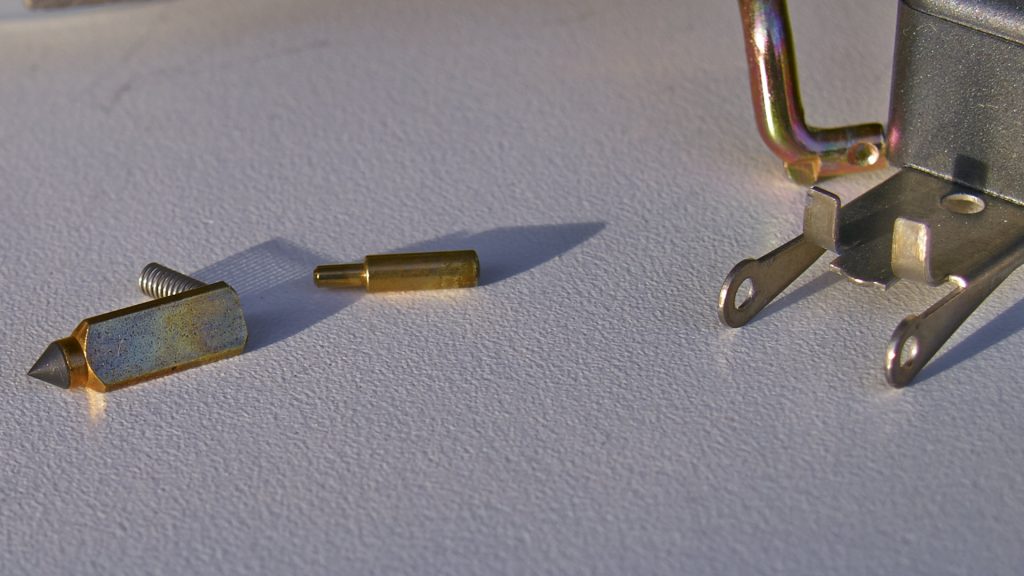
The vacuum port was plugged with what looks like paper fibers, most likely from the worker cleaning it, paper towel is a no no as far as I am concerned for a carb cleaning. Easy clean out.
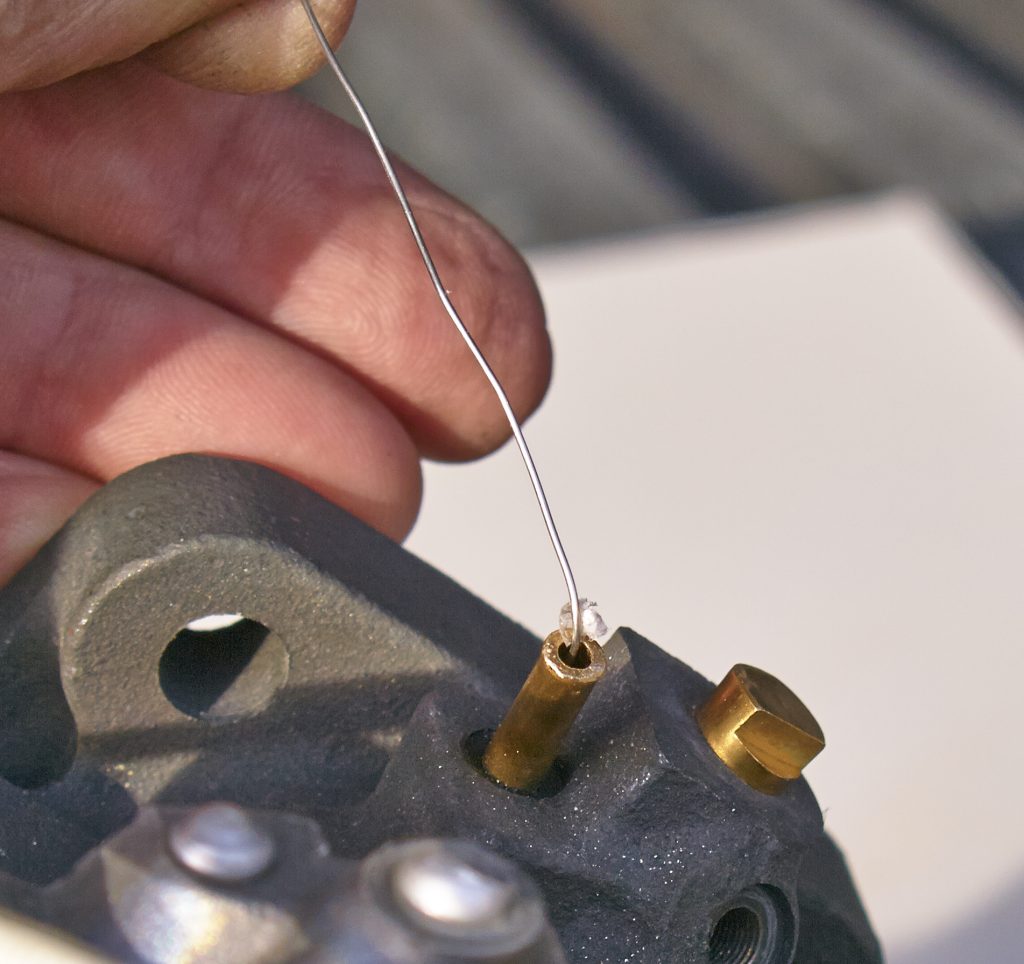
The brass end of the port looked as if it to took a bit of the dropping problem as the end was with burrs and flattened, but that to was an easy fit also with a file. The accelerator pump plunger looks to be leather but not real sure. the gasket for the top is not paper as I have seen in the past but a more exhaust manifold type gasket type, silver shinny but soft enough to seal down.
I blew all the ports and holes out as best as possible, the install is next and see how it runs. But for the carb itself on what I have seen so far on a 1-10, I will give it a 9 not to include the bent parts. Not bad so far.
Not all carbs are created equal but this one seems to be good enough for a back-up or a just-in-case so far. Hope this is a help to some folks that are looking for a carb for your glove box.
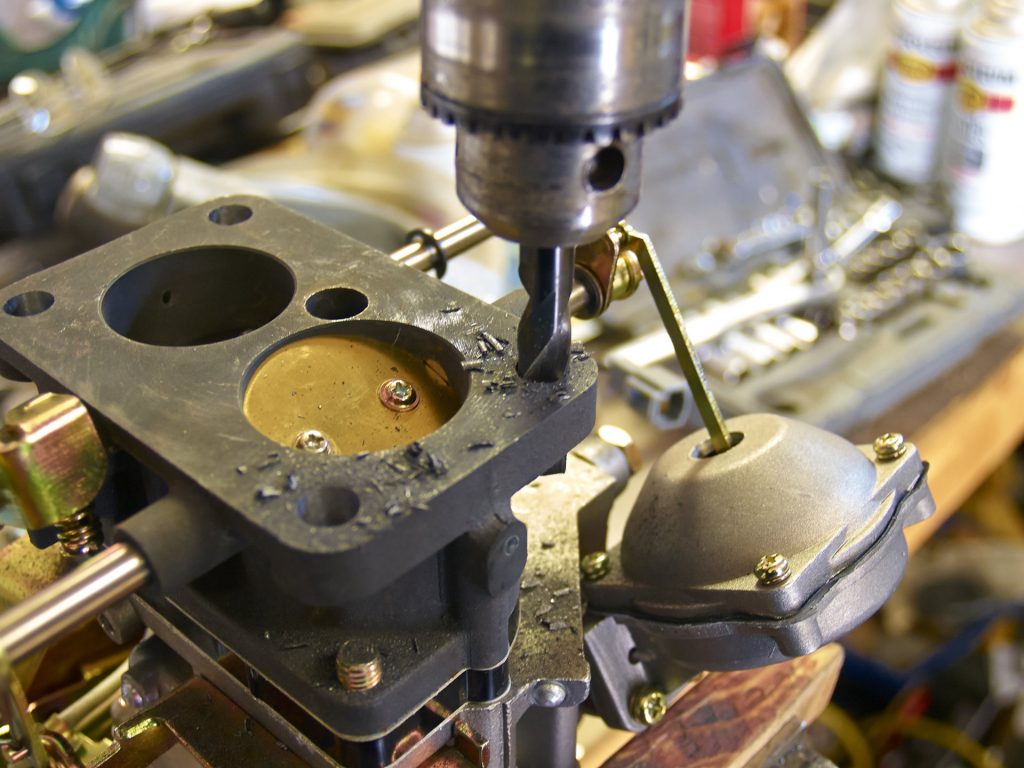
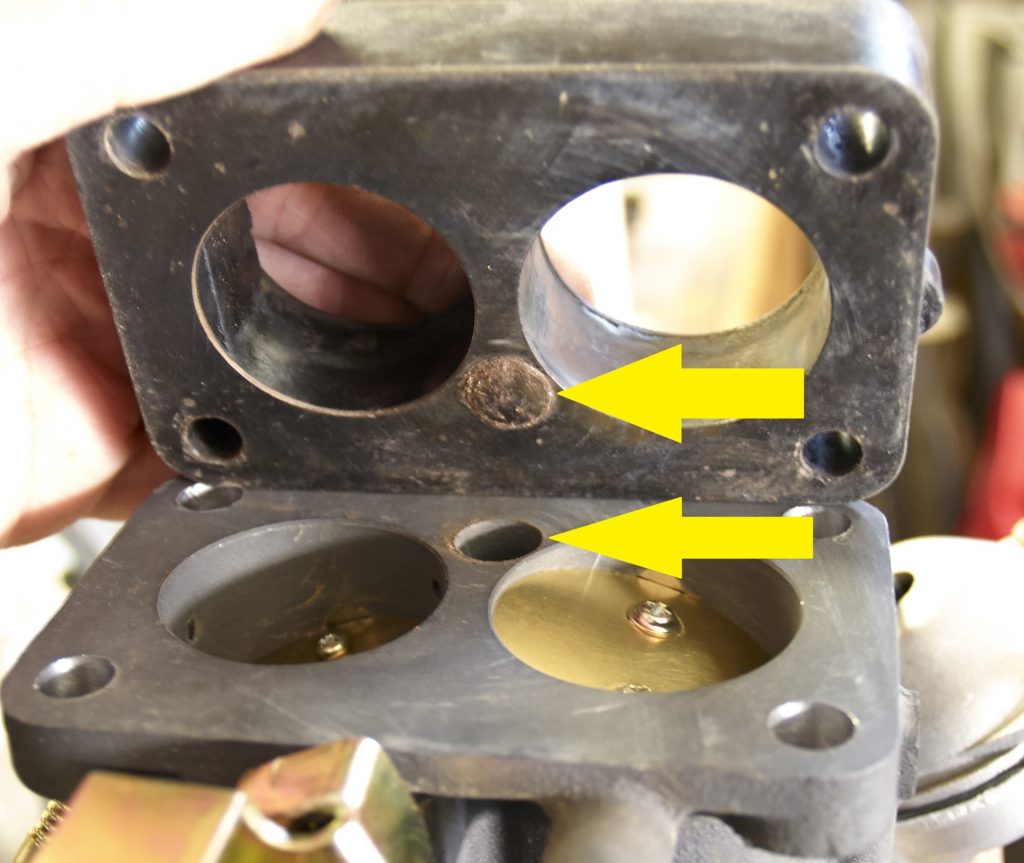
I took a week to finish the install and run up results. Installed the carb with only one small problem. I went to set the insulation block on, the one between the carb base and the manifold, and found the four holes that were drilled in the Carbs base were just a hair off from factory. This made the insulators rounded seal off-set when in place with the mount studs and the carb would rock on the high point not being able to seat down flat. So I decided to drill out the carbs mount holes one size over so I could slide the carbs body L/R a mm or so to seat on the high point in the carbs hole. You can see in the one photo were it was off ( only two were off ) It worked and the rest was no problem.
I was not able to install the TP from my other carb, I guess it not a big deal any way, if right I believe that one of the Carb experts said I really do not need it anyway as the carb is most likely off a FJ60 with A/C.
Anyway cracked it over for about 20 seconds and it came alive, slight adjustments, took it out and it actually performed a bit better than the stock carb. Not one problem. Going to leave it on for a bit longer and do a bit of work on the stock. On this companies Carb I would buy one again if I needed one.
Just passing on my experience to you, hope it’s a help to someone.


.jpg?x-oss-process=image/auto-orient,1/quality,q_100/resize,m_mfit,w_350,h_350 "4PCS 6X139.7 50mm compatible for Toyota Landcruiser Patrol Hilux 4WD wheel spacers MSR EB94")
.jpg?x-oss-process=image/auto-orient,1/quality,q_100/resize,m_mfit,w_350,h_350 "Pair Free Wheel Hubs For MT compatible for Toyota Land Cruiser HZJ80 FZJ 70/75 43530-69045")
.jpg?x-oss-process=image/auto-orient,1/quality,q_100/resize,m_mfit,w_350,h_350 "Carburetor compatible for Toyota Corolla Starlet TRUENO 1974-1981 2110024034 carburettor")
.jpg?x-oss-process=image/auto-orient,1/quality,q_100/resize,m_mfit,w_350,h_350 "Carburetor compatible for Volkswagen 1967-1979 1600cc compatible for VW Beetle 34 PICT-3 113 129 031 K carby carb")
.jpg?x-oss-process=image/auto-orient,1/quality,q_100/resize,m_mfit,w_350,h_350 "Compatible for Fiat Ford Volkswagen Renault Dodge Replace 38X38 2 BARREL")
.jpg?x-oss-process=image/auto-orient,1/quality,q_100/resize,m_mfit,w_350,h_350)
.jpg?x-oss-process=image/auto-orient,1/quality,q_100/resize,m_mfit,w_350,h_350)
.jpg?x-oss-process=image/auto-orient,1/quality,q_100/resize,m_mfit,w_350,h_350)
.jpg?x-oss-process=image/auto-orient,1/quality,q_100/resize,m_mfit,w_350,h_350)
.jpg?x-oss-process=image/auto-orient,1/quality,q_100/resize,m_mfit,w_350,h_350)
.jpg?x-oss-process=image/auto-orient,1/quality,q_100/resize,m_mfit,w_350,h_350)
.jpg?x-oss-process=image/auto-orient,1/quality,q_100/resize,m_mfit,w_350,h_350)